Posts

Showing posts from 2012

Aunt Emma's Chocolate Mint Cookies
Image
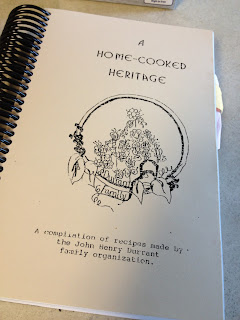
This recipe has been a favorite in our home for years.  Mom always made them every Christmas. Mom and Dad also had them made by the hundreds for their 40th wedding anniversary in 1988. They are printed in The Durrant Family Cookbook "A Home-Cooked Heritage" page VIII-1 (cookie section) Book published in 1991, reprinted December 2010.  I don't know when they became a holiday staple in our house, but I have to make them every year too.  These cookies just seem to say Merry Christmas to me.  This is a three-step cookie, but it really couldn't be easier.  It has a brownie base, a creamy frosting filling and a bitter-sweet dark chocolate topping.  Yum! I double this recipe to fit in a large, 12x14 sheet pan. 2 eggs, beaten 1 c. sugar 1/2 tsp peppermint extract or 5-6 drops of peppermint oil 1/2 c. margarine melted (I use butter) 2 squares melted unsweetened baking chocolate 1/2 c. sifted flour 1/2 c. walnuts, chopped small Beat eggs, (but not like I did,)

Mending Jeans

Image
My cousin asked me today if people still really do this, well, yes, I still do. My hubby regularly rips holes in knees and so do my four boys.  Buying new jeans is just not an option for us. I have even been known to pick some up at the thrift store and repair them as well.  Boys size 10-12 jeans are hard to come by so I'll take what I can get.   Here's a little tutorial on how I accomplish this task without the use of those yucky iron-on patches. First of all, I keep any lower pant legs that I cut off from making denim shorts out of the "too-bad-to-mend" pairs.  This is my "patch" material. Step one: Open up the leg seam about 8 inches past the seam on both sides.  Give yourself plenty of room to get into the leg area. Step two: Cut your patch about 1-2 inches bigger than the size of the hole. Make it a nice square or rectangle in proportion with the hole. Step three: Turn your pant leg inside out and stick a large ruler inside or a p

Beginning Canning Class

Image
Yesterday was my first beginning Canning class. I had three lovely ladies attend. We had such a good time learning and working together. I heard this quote this morning and I think it really applies, "Give a woman a jar of food and you feed her for a day, but teach her how to can an you feed her and her family for a lifetime!" What an amazing legacy. I'm honored to have the opportunity to impart some knowledge of the craft to these ladies.

Canning shelves

Image
My kids and I built these shelves after only one day of planning and one day of building.

Thrift store find

Image
I found this at the local thrift store and brought her home with me. I'm not good with anything other than dating the machine. Can anyone tell me what model she is and how I can get parts. Thanks!!

Durrant Cookbook-Powerhouse Pudding

Image
Here's another quick review from the Durrant Family Cookbook, A Home-Cooked Heritage. I believe this recipe originally came from the back of the Cream of Wheat container, but I have done research on the web and I can't seem to find any evidence of that. Maybe it's just lost to everyone but we Durrants who have the cookbook. So, here is our family-favorite breakfast. It was originally published in the dessert section of the Durrant Cookbook because of the name pudding, but it's really hot cereal. POWERHOUSE PUDDING 8 c. milk (I use 8 c. water and 2-3 c. powdered milk) 1 tsp salt. 1 c. Instant Cream of Wheat 4 eggs, beaten Bring milk and salt to a boil. Slowly sprinkle in Cream of Wheat, stirring constantly. Keep stirring over medium heat for 1 minute. Remove from heat. Beat a little of the hot cream of wheat into the beaten eggs. Return egg mixture to pan, stir and cook 1 minute more. Add your choice of flavoring and serve hot or chilled. VA

Laundry soap revisited...

Image
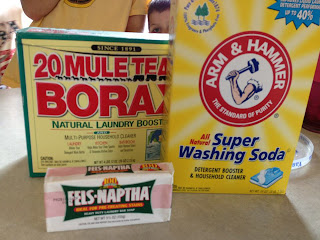
I'm frugal. Some may call me down right cheap. That's ok.  When you have a family as big as ours you have to find ways to be creative.  When Bear bought me a new washer and dryer set, we stocked up on Arm and Hammer liquid laundry detergent. I like it, it works and it's pretty cheap too. But this month, our budget took a major hit.  Big Blue, my '98 Suburban blew the engine. She was very sick.  So, her new heart is costing us this month's grocery budget and then some.  I had to find ways of cutting corners. We have been living off our food storage this month and doing without the "fun stuff" in order to pay for the "heart" transplant. I thought that since my laundry detergent supply was getting low I would save my pennies and buy the ingredients to make my own. I've done this before, and made the liquid kind but I really didn't care for the gloppy goop that I came up with.  I have no place in my laundry room for a large 5 gallon

Something REALLY IMPORTANT to blog about...

Image
http://kristygriffard.blogspot.com/2012/07/meridian-speedway-fundraiser.html The quilt was made by my sister Sylvia and me in memory of my brother Gordon who recently died of Leukemia. The money goes to the Leukemia and Lymphoma Society. My neice Kristy and my brother Brian are training to run in the City of Trees Marathon on October 14 th . The  goal is $4500 for our team ($1500 X 3) and they are at almost $1500 right now. The quilt my sister Sylvia and I created is now being auctioned. Contact my neice Kristy at the above link, if you are interested.  Tickets are $1. You don't need to be present to win, nor do you need to attend to purchase tickets.

Being satisfied

Image
I find myself wishing a lot lately.  Wishing I were thinner, wishing my foot didn't hurt, wishing it wouldn't rain so much, wishing the laundry was finished--and would stay that way. I wish that summer was here already, wishing the kids were better at doing their schoolwork. The thing I most wish is that were moving. Not necessarily packing and driving to a new place, but that we knew the direction God has planned for us--that we were actually going places, heading in a new direction. God isn't finished with us here yet and I think that is what irritates me.  I think in my own feeble mind that I have learned all I can here and it's time to move on.  I long to be settled. I long to be able to plant an apple tree and see it grow from a young sapling to a productive tree.  I long to plan and design a home that will be comfortable with my things in their places. I'm ready, but God says wait.  God has said that for a while now and I get so impatient just waiting.

I'll take her on...

Image
Years ago, when I started this blog I made up this persona, Skinny Girl.  She lives inside of me and has even made herself public for a while after the birth of Robbie. I've managed to subdue her and keep her quiet with copious amounts of chocolate cake, pies and very little activity. I'm surprised at how easy it was to shut her up. She's been screaming for a few months and I can't ignore her any longer. She occasionally rears her skinny little head and crabs at me to take a hike--or a walk--whatever; the message is the same to me. I don't like Fat Girl either. She's annoying.  She whines about aches and pains and bi-focals and tendonitis. I'm tired of hearing how her clothes don't fit right, how the bathroom scales show larger numbers during "that time of the month." So, in order to shut them both up, and thereby create a bit more sanity inside my head, I have tried to take long walks along our bike path, but I've developed foot p

Busy with my new friend, Lucy

Image
My new friend is my Tin Lizzie, whom I have affectionately named Lucy.  She and I have been getting to know one another as we work out our little idiosincrisies. I've finished 7 quilt since I got her up and running just a month and a half.  My free motion quilting has improved, and I've learned a few things that have made my quilting better.  The biggest thing I have learned is to slow down and do things right the first time.  Planning the design is probably the hardest part. I have completed some quilts using an all over meander, scrolls with hearts, flowers and stars intermingled. My greatest accomplishment is a sampler quilt for a friend. I can't unveil it yet because it hasn't been given yet. Soon, I promise. Here are a few pictures of the latest finishes:  This is a quilt top my Mom put together with a piece of vintage toy fabric. The toys are vintage and so is the fabric! I quilted it with an all over scroll design.  It was quilt number 1.  Quilt numbe

Tin Lizzie 18 DLS

My dear sweet hubby let me buy, in fact encouraged me to purchase, a floor model Tin Lizzie 18 DLS.  I've been stitching lots of flimsies lately, and getting a lot done, yet I feel sort of numb to it all. I put money down on layaway before Gordon died and brought the machine home just after the funeral. I promise I will post pictures and add descriptions soon, my heart hurts, I'm in emotional pain and quilting gives me something to concentrate on and a brainless task to accomplish.  It has been my therapy, literally, to go in my sewing room and just work. The house is sort of falling apart, my kids are bickering and their schooling is slacking considerably. This post may not even be coherent, I'm feeling very foggy since Gordon's funeral.

My dearly beloved brother.

Image
This is my brother's obituary.  I'm reposting it here, but removing all last names as this blog is basically anonymous.  So if anyone thinks it is different, that is why. Gordon, 48, of Lehi, Utah died Friday, March 16, 2012, after a short battle with leukemia. Gordon was born in1963 in Boise, Idaho, the fourth son and sixth child of Loren and Carolyn. He graduated from Kuna High School, attended Boise State University, and graduated from DeVry University with a B.S. in Computer Programming. He served a mission for The Church of Jesus Christ of Latter-day Saints in Anaheim, California. Gordon married his sweetheart Dixie and their blended family included one daughter and five sons. He worked for NuSkin as a software programmer and analyst. One of Gordon’s greatest skills was his ability to serve others and make and develop lasting friendships. He was an active member of The Church of Jesus Christ of Latter-day Saints and loved working with the youth. His fellow choir members

Spools used in 2011!

Image
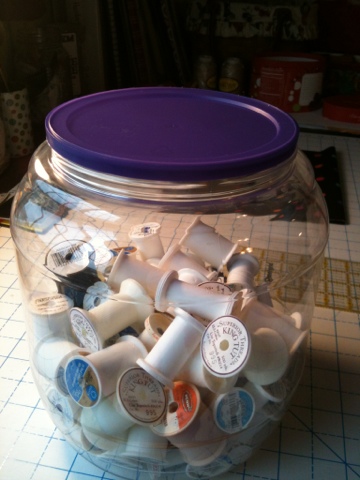
I love seeing all those King Tut spools! Those mean completed quilts, because that's the quilting thread I use. Those are finished projects in that jar!

Seeing Orange

Image
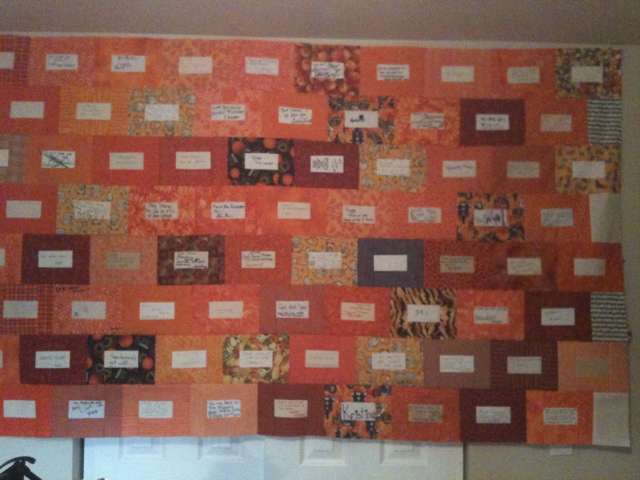
The first eight rows are finished for my brother's quilt. I'm still waiting for some stragglers to get here. I will be making an additional row to get them all in. Can't wait to start quilting it!

1930s Hexies

Image
A dear friend asked me to repair and then quilt this for her. It's about baby quilt sized and the Hexies are about 1.5 inches across. I recognize some feed sacks and lovely cheddar solids. The ecru borders are batiste and organza. The organza is two layers in some places. Where frugality abounds, there are no quilt police.

Thimbles and something extra...

Image
Bonnie Hunter over at Quiltville asked her readers about thimbles, which ones we use, how we like them, etc. So here's my take on it. I have several that I use, all the same kind actually. I have tried several that have ended up in the sewing basket graveyard. I have a modified stretchy-band kind that I use for my "thumble" when I quilt using my floor frame. When I quilt in a hoop I just turn the hoop to the direction I need so that I can use my middle finger thimble. I recently finished a quilt for a friend of mine that her grandmother had pieced and assembled. It was already basted, and the edges were folded over from the back. About 3 inches from the edge I hit a thick spot that really slowed me down, it turns out the lady had added a layer of flannel to the poly batting before it was basted. I bet it helps keep them warm during those Color ado winters, but boy, was it hard to quilt through. My favorite thimble, and the ones that I keep in every

Quilt Block Tutorial

Image
Many of my family members have asked for a tutorial for the quilt block for my brother's quilt.  He was recently diagnosed with leukemia.  I decided to make a quilt for signatures.  This is what I came up with. For this block you will need the following pieces: beige center: cut one 2 1/2" x 4 1/2" rectangle Orange outer "bricks" cut two 2 1/2" x 4 1/2" rectangles and two 2 1/2" x 6 1/2" rectangles. Lay them out as pictured below:  Using a scant 1/4" sew one rectangle to the beige center and press toward the colored piece, away from the center beige rectangle.  Then sew the next rectangle to the opposite side and press away from the center piece.  Take one of the longer rectangles and place it face up on your table and allign the center section face down on top of the strip so you can make sure the seams stay where you have pressed them and sew one side of the rectangle on.  Flip this piece out and press again toward the orange strip.