The making of ME!
For years I have been enamored with Mama CJT’s “Ladies”
series of quilts. You can see more of
her mini quilts here. She makes the most
adorable ladies! I decided I wanted one for myself. This is how I created my “Quilt ME”
Enter, the "selfie" I'm not good at selfies, that's more of my teenage daughter's thing, not me, but I needed a good facial pic of me. I took dozens of photos.

I tried glasses up, and glasses down. Even though I always wear them up on my nose, I thought my eyes looked better over the tops of my lenses rather than through. So if you have glasses, try them both ways, I preferred them down.

I tried big smile, with teeth, and closed mouth. Closed mouth, slight smile worked for me. My ME quilt is almost serious, or mischievous.

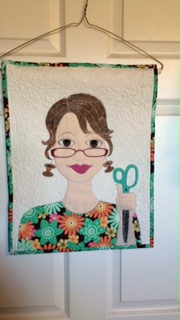
I also took pics of my hand holding the scissors. I wanted the shape of my knuckles to be right.

Then I sketched. This is the part that I really can't help you with. I'm not a great artist, but if you know someone who does caricatures, now would be the time to call them up and ask for a favor.

I colored the sketch and made alterations to the hand. In the end I turned the scissors around.

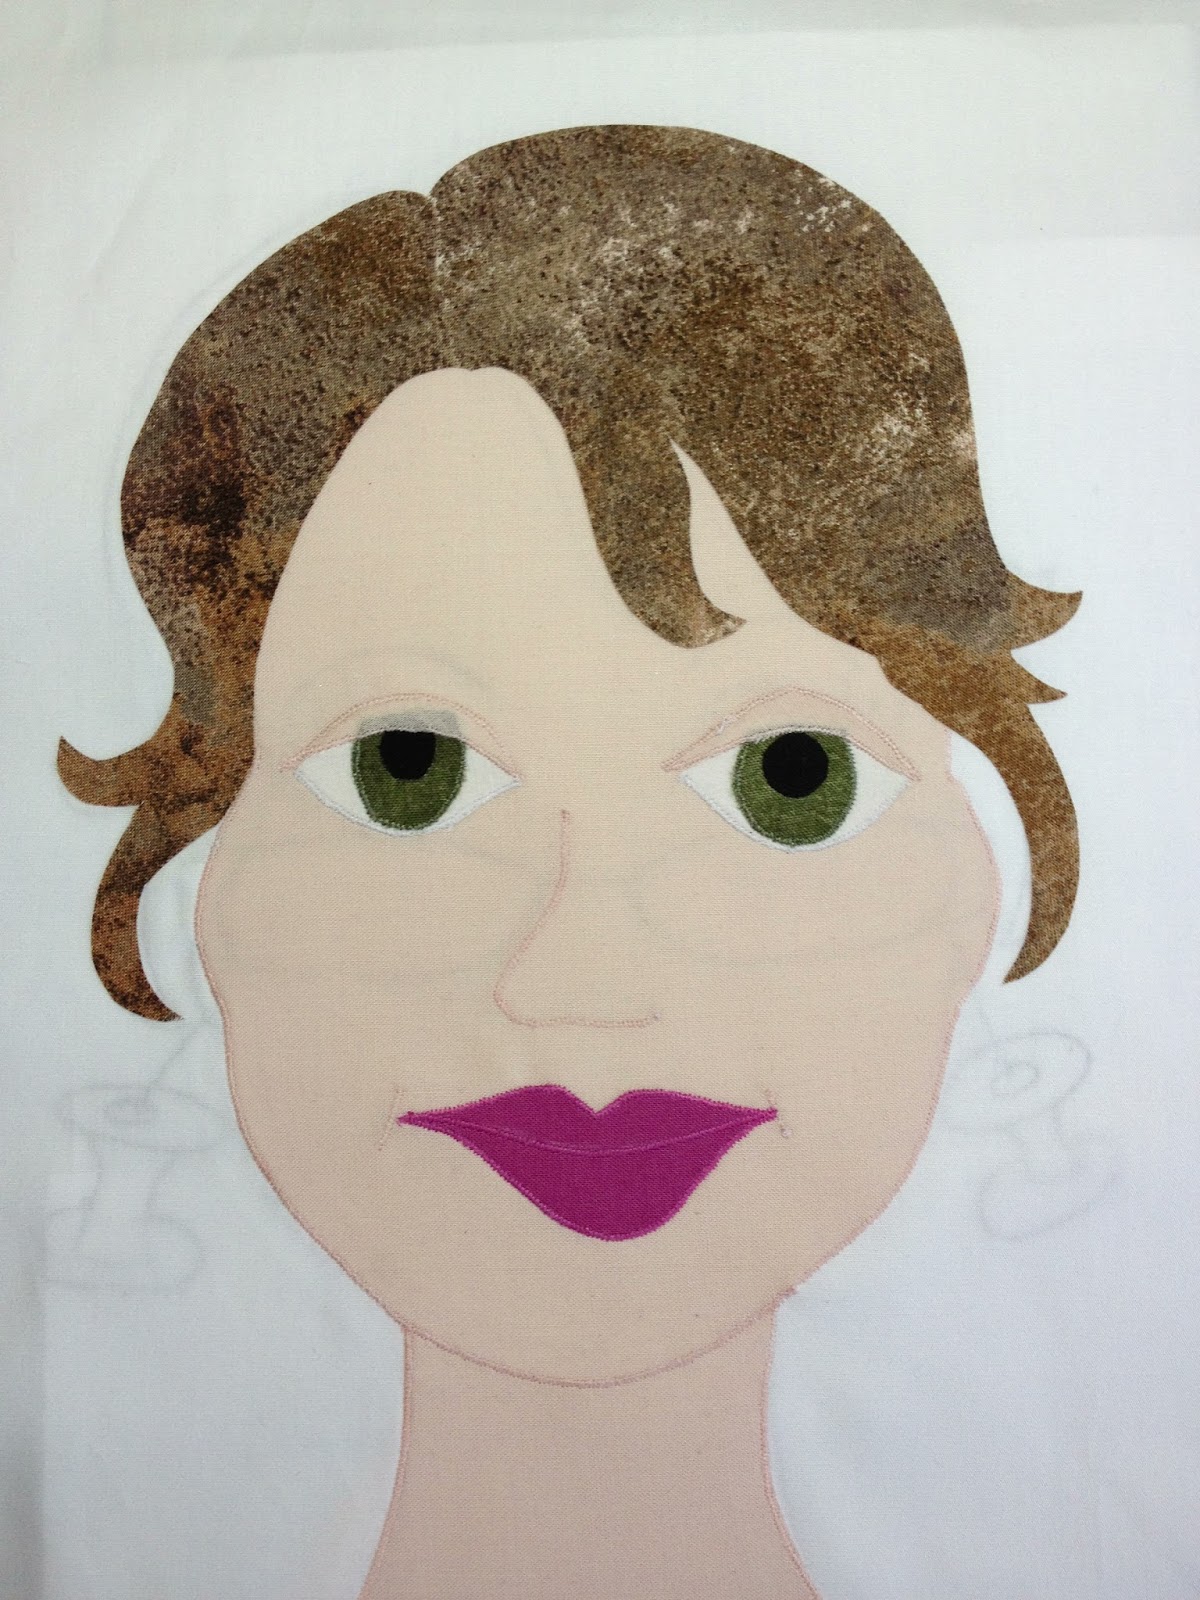
I picked fabrics from my stash and matched my grey-blonde hair, hazel eyes and my lip color.

I used Steam A Seam 2, and laid all the parts out.

This part was a bit scary, once I ironed them down, there was no going back! Crooked smile!

I used my pattern underneath the white background fabric for placement purposes, lining up the little pieces to coincide with the pattern.

Then using a tiny zigzag stitch I carefully appliqued ever piece down and added nose stitching for a subtle nose. I added eyelash details with black thread and iris color with an Ultra Fine Point Sharpie.
I decided to flip the scissors over so the green handle would show better, and added spools for earrings.

Finally, and some years later, I put ME on the long arm and did the quilting. That part was a little scary for me, I didn't want to mess it up, so I practiced a lot on customer quilts and got better and better.
I finished my Quilt ME with a small label, hanging sleeve and binding. She hangs in my studio at Mary's Custom Quilting.


Hope you enjoy the little tutorial! Let me know if I can answer any questions for you. You can use Facebook to message me at the above link or leave a comment here on my blog. Thanks for reading!


Comments